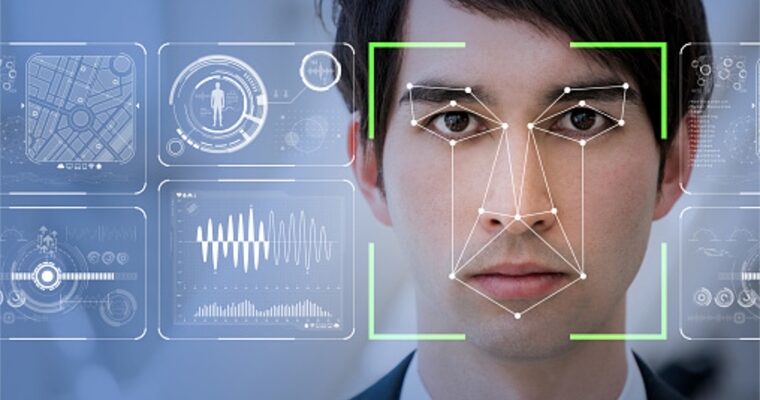
Face Recognition refers to identifying a face in a given image and verifying the person in the image. They are used in a wide range of applications, including but not limited to: User Verification, Attendance Systems, Robotics and Augmented Reality. With the growth in applications, we are likely to see great development in the field.

Input Image 
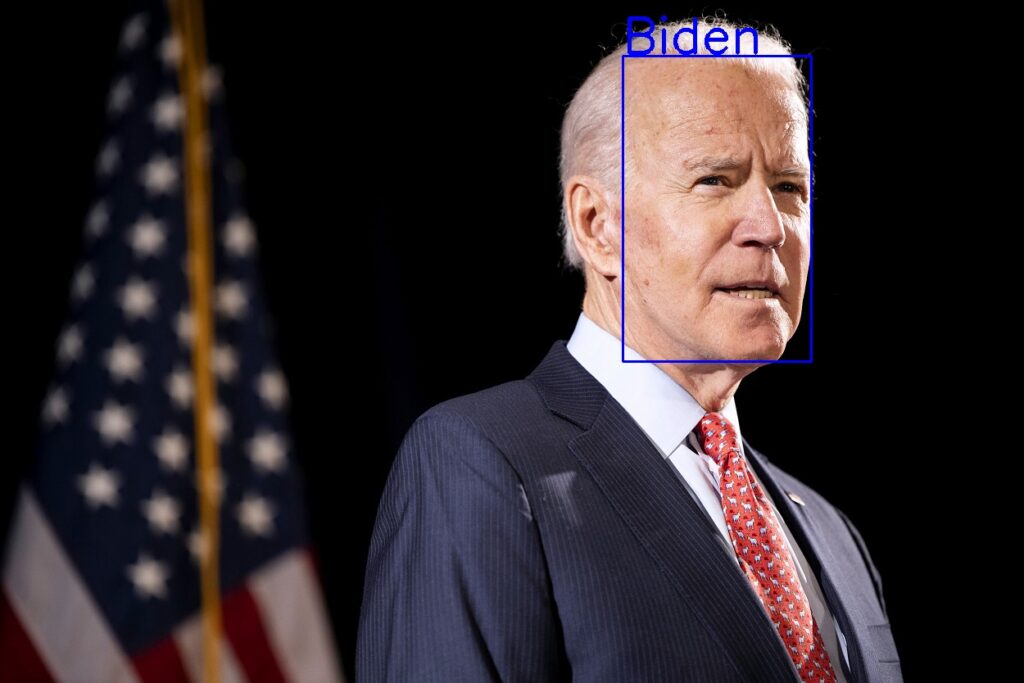
Output Image
OpenCV DNN Face Detector
OpenCV comes with a DNN (Deep Neural Network) module that allows loading pre-trained neural networks into OpenCV. This improves speed incredibly, reduces the need for dependencies and most models are very light in size. We will be using a pre-trained Face Detector model that allows us to locate the face from a given image. Other than Face Detector, there are various models available for OpenCV DNN.
One-Shot Learning
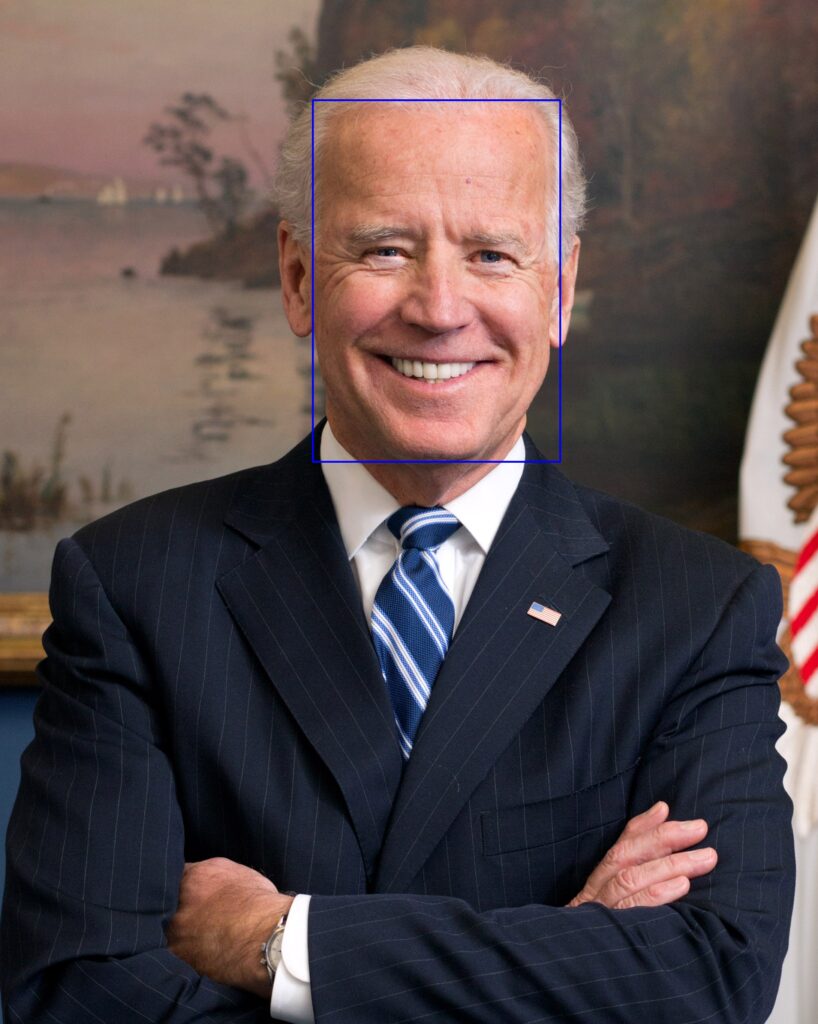
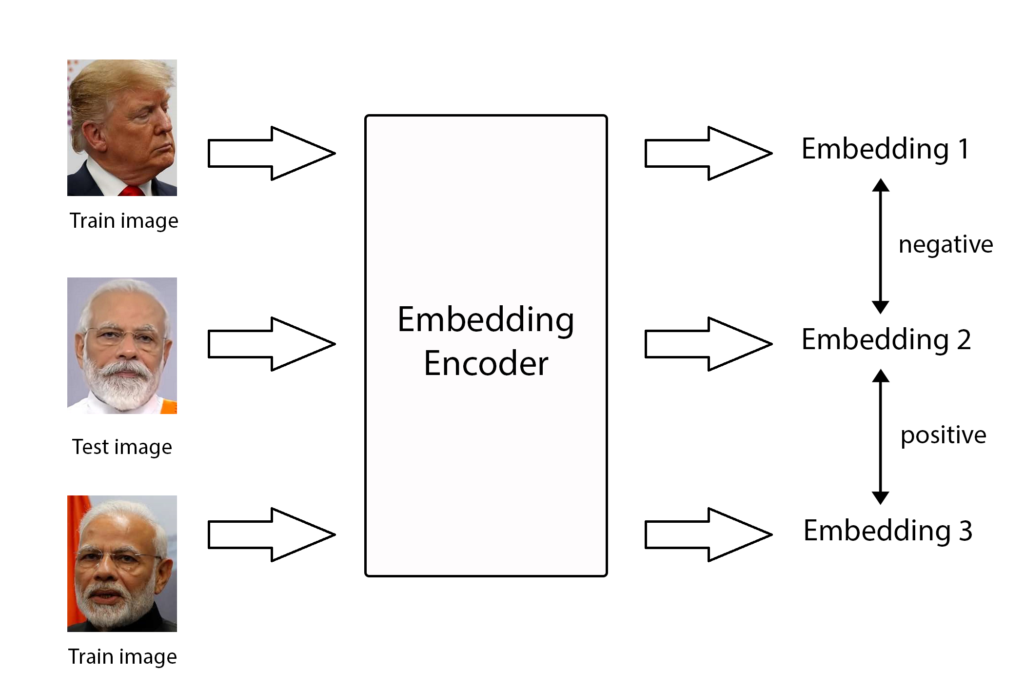
Previous methods for Face Recognition involves a requirement of large data for a single person and a training time for every new addition to the dataset. However, most of the modern Face Recognition techniques use an alternative, called One-Shot Learning. One-shot training deals with finding the best match of the test case with available training cases rather than trying to classify the test image with a trained model. It involves using 1 training image per class and the test image is compared for similarity with all the training images. For this, we use FaceNet: A Unified Embedding for Face Recognition and Clustering to generate the embeddings and compare the embeddings as suggested by Siamese Neural Networks for One-shot Image Recognition.
Running Face Recognition
- Clone face-recognition-python repository:
!git clone https://github.com/deepme987/face-recognition-python.git - Download Face Detection model from Google Drive and extract the content under {repository_directory}/Models/FaceDetection/
- Installing the required packages:
pip install -r requirements.txt - Run the Face Recognition:
python face_recognition.py --input samples\test.jpg --display-image
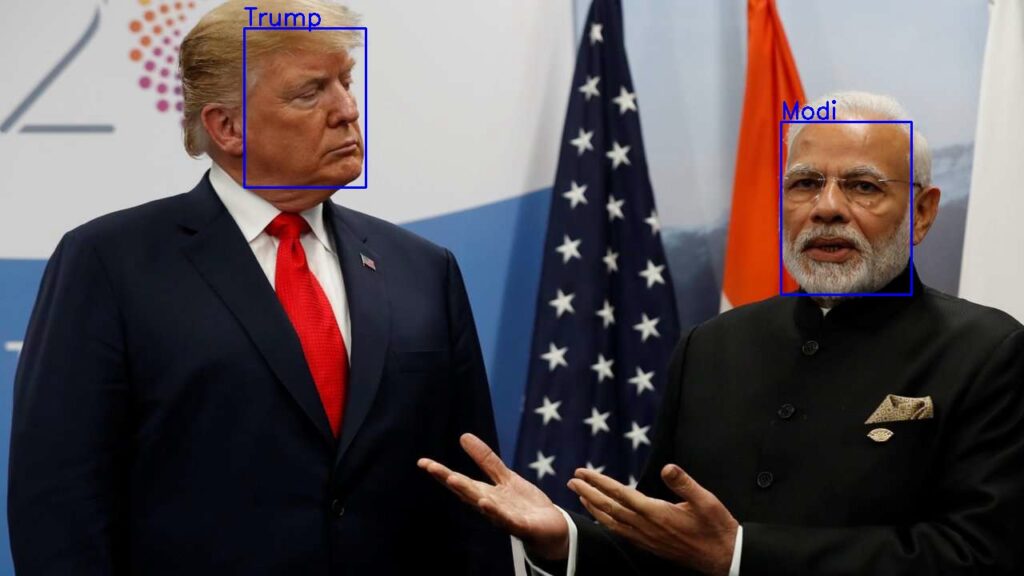
This displays the image with detected faces and also prints the results as a list on the console.
Detailed Explanation for Face Recognition
Pre-requisites

Modi 
Trump 
Biden Diving into the code
OpenCV DNN Face Detector
Face Detection Model
- If the model is unable to detect a valid face, reduce the threshold value
- If the model is detecting other objects as face or detects overlapped faces, increase the threshold value
- If a face is found but not recognized as expected, increase the verification_threshold
- If a face is being recognized as wrong person, decrease the verification_threshold
- –input: Path to image or video input; Default: no path – uses webcam
- –display-image: Flag to display the training and detected images
- –faces-dir: Directory to the training folder; Default: “faces/”

Input 
Output
Step 1: Clone Github Repository
This includes the files that we’ll be using to run face detection along with necessary OpenCV DNN model and config. You can either run it off-the-shelf or modify the according to your integration requirements.
git clone https://github.com/deepme987/face-recognition-python.gitStep 2: Download Face Detection Model
Alireza Akhavan provides a pre-trained model for finding Face Embeddings. You can also check out models provided by FaceNet. However, you may need to modify the code accordingly to integrate the models.
The zip file consists of various files used by the model (checkpoint, pb model, meta description). Extract it under {repository_dir}/Models/FaceDetection/ folder.

Step 3: Save Images of people to detect
In one-shot training, we use one image of a person to find their original embeddings. For a new image, we calculate embeddings for the face. This embedding is compared with the earlier calculated embeddings. If the similarity between two images is within a given threshold, we can say that both images refer to the same person.
For this, we need to save the original images of the person under {repository_dir}/faces/. Save the image with the name of the person. Since we read the image using OpenCV, we can save different image formats as well. The images should have a clear picture of the person’s front-face (a side face would result in poor accuracy). In the repository, we used images of political leaders – random images found over the internet.
Step 4: Create a virtual environment (optional)
A virtual environment helps to install packages for specific usage. Although it is an optional step, we highly recommend creating a separate environment. To create a virtual environment, refer our guide on How to Create a Virtual Environment (venv) in Python.
Step 5: Install the required packages
For running Face Recognition, we require the following python packages:
opencv-python
tensorflow
You can install them directly using pip install -r requirements.txt.
1. Loading Necessary Models
OpenCV Face Detector is a light weight model to detect Face Regions within a given image. The model, being less than 3MB in size, is included directly in the repository. If you wish to download the model directly, it is available under References. OpenCV DNN provides various functions to load the models based on their structure (readNetFromTensorflow, readNetFromDarknet, etc). Since our Face Detector model is trained using Tensorflow, we use cv2.dnn.readNetFromTensorflow. The function takes directory to the frozen .pb model and a .pbtxt file that acts as configuration for the specified model.
def load_opencv():
    model_path = "./Models/OpenCV/opencv_face_detector_uint8.pb"
    model_pbtxt = "./Models/OpenCV/opencv_face_detector.pbtxt"
    net = cv2.dnn.readNetFromTensorflow(model_path, model_pbtxt)
return netThe Face Detection model generates an Embedding Vector (Embeddings) for a given image. These embeddings consist of features within the image. It is an approach to convert image data into numerical data that can be used for comparison purpose. The Face Detection model is in the form of a Tensorflow Graph and the _face_detection.py consists of the functions to load the model directly from the directory. Once the model is loaded, we initialize with default values.
import _face_detection as ftk

def load_face_detection():
    v = ftk.Verification()
    v.load_model("./Models/FaceDetection/")
    v.initial_input_output_tensors()
    return v
2. Face Detector
We write a detect_faces function that takes an image as an input and returns a list containing coordinates of faces within the image. This saves us from writing duplicate code segments as we need to detect faces multiple times. The incoming image is converted into a Blob that is used by OpenCV to perform detections on the image. The net model takes this blob as input and calling net.forward() returns the detections of the model. In case the model fails to properly detect images, we can change the confidence threshold value.
def detect_faces(image):
    height, width, channels = image.shape

    blob = cv2.dnn.blobFromImage(image, 1.0, (300, 300), [104, 117, 123], False, False)
    FaceDetection.net.setInput(blob)
    detections = FaceDetection.net.forward()

    faces = []

    for i in range(detections.shape[2]):
        confidence = detections[0, 0, i, 2]
        if confidence > 0.5:
            x1 = int(detections[0, 0, i, 3] * width)
            y1 = int(detections[0, 0, i, 4] * height)
            x2 = int(detections[0, 0, i, 5] * width)
            y2 = int(detections[0, 0, i, 6] * height)
            faces.append([x1, y1, x2 - x1, y2 - y1])

    return faces
3. Loading Embeddings for training images
We create another function that takes the directory of the images we saved in Step 3 of Pre-Requisites (default directory is “faces/”). A loop goes through all the images in the directory, detect the face in the image and save its embedding to embeddings dictionary.
def load_face_embeddings(image_dir):
    embeddings = {}

    for file in os.listdir(image_dir):
        img_path = image_dir + file
        image = cv2.imread(img_path)
        faces = FaceDetection.detect_faces(image, display_image)
        x, y, w, h = faces[0]
        image = image[y:y + h, x:x + w]
        embeddings[file.split(".")[0]] = FaceDetection.v.img_to_encoding(cv2.resize(image, (160, 160)), FaceDetection.image_size)

    return embeddings
4. Writing an Embedding Comparison Function
Our encoded embeddings for images are numpy arrays, hence we need to write a function that can compare two arrays and return the difference between them as a scalar value. This function also takes care of the verification threshold (max value of dissimilarity to be considered for deciding 2 faces as same). We can change this value as well as per our requirements. FaceNet suggests a value of 1.2, however, we found some false detections while using 1.2. Instead, we recommend using verification_threshold = 0.8. The function returns a boolean value to determine if the embedding difference is within the threshold and the difference itself that can be used to sort the values in case of multiple detections.
def is_same(emb1, emb2):
    diff = np.subtract(emb1, emb2)
    diff = np.sum(np.square(diff))
    return diff < FaceDetection.verification_threshold, diff
5. Fetch Detections for test image
Once we have all the models loaded and embeddings for training images calculated, we can run the Face Recognition for test image. First, we detect the faces within the image using detect_faces() and find its embedding. We then compare the test image embedding with every train image embedding. If there are multiple detections, we sort them according to the differences and assign the image with the lowest difference (most similar) as the detected image. Since there can be more than 1 face in test image, the detections parameter is an array.
def fetch_detections(image, embeddings):
    faces = FaceDetection.detect_faces(image)

    detections = []
    for face in faces:
        x, y, w, h = face
        im_face = image[y:y + h, x:x + w]
        img = cv2.resize(im_face, (200, 200))
        user_embed = FaceDetection.v.img_to_encoding(cv2.resize(img, (160, 160)), FaceDetection.image_size)

        detected = {}
        for _user in embeddings:
            flag, thresh = FaceDetection.is_same(embeddings[_user], user_embed)
            if flag:
                detected[_user] = thresh

        detected = {k: v for k, v in sorted(detected.items(), key=lambda item: item[1])}
        detected = list(detected.keys())
        if len(detected) > 0:
            detections.append(detected[0])

    return detections
6. Wrapping everything into a function
Now that we have all the functions, we can write a function to wrap the whole process. This function takes care of the parameters, loads the models, embeddings, handles image, video and webcam switching and runs the detection based on input. We can call this function using a __main__ file that takes arguments from the console and sends it to the function.
def face_recognition(image_or_video_path=None, display_image=False, face_dir="faces/"):
    FaceDetection.load_models()
    embeddings = FaceDetection.load_face_embeddings(face_dir, display_image)
    if image_or_video_path:
        cap = cv2.VideoCapture(image_or_video_path) # Use the image or video path
    else:
        cap = cv2.VideoCapture(0) # Capture using webcam
    while 1:
        ret, image = cap.read()
        if not ret:
            return
        print(FaceDetection.fetch_detections(image, embeddings, display_image))

    cap.release()
    cv2.destroyAllWindows()
7. Writing the main function
The face_recognition.py accepts 3 arguments:
In order to parse these arguments and call the face_recognition, we write the main function.
if __name__ == '__main__':
    parser = argparse.ArgumentParser()
    parser.add_argument('--input', type=str, default=None, help='Path to input file')
    parser.add_argument("--display-image", action="store_true", help="Display Detected Image")
    parser.add_argument('--faces-dir', type=str, default="faces/", help='Path to faces dir')
    args = parser.parse_args()

    face_recognition(args.input, args.display_image, args.faces_dir)
With this, we finish our Face Recognition program. Although we went through whole functional code, the repository file contains handling of common errors and some additional quality features in the form of a Python class.
8. Running the code
We can use the face_recognition.py script to run the code.
Running python face_recognition.py --input input/test2.jpg --display-image will give the following output:
In case we wish to not see the output, we can drop the --display-image parameter. This will print the detected faces as a list in the console.
Integrating Face Recognition with your code
If you’re here looking to build an application using Face Recognition, you can easily integrate our code into your application. The following points may help you with the integration:
- Follow the above guide as-is.
- Edit face_recognition.py for the following changes:
- Edit the directories as per requirements
- Trim the code for specific input type. As of now, the code is written to handle different inputs automatically; however, if you intend to use only one type of input, you can edit the function face_recognition() accordingly.
- Ideally, the class functions should not require any changes unless you wish to change the detection process.
- Setting the threshold values to fine-tune with your application environment
- Import the directory as a python package and call the function to easily integrate with your code.
Similar Reads
References
- Github Repository: Face Recognition Python
- OpenCV Models: detector, config
- Face Detection Model
- OpenCV
- FaceNet: A Unified Embedding for Face Recognition and Clustering
- Siamese Neural Networks for One-shot Image Recognition








Please give access to the google drive to above gmail